Video Production -How to get Clean Audio

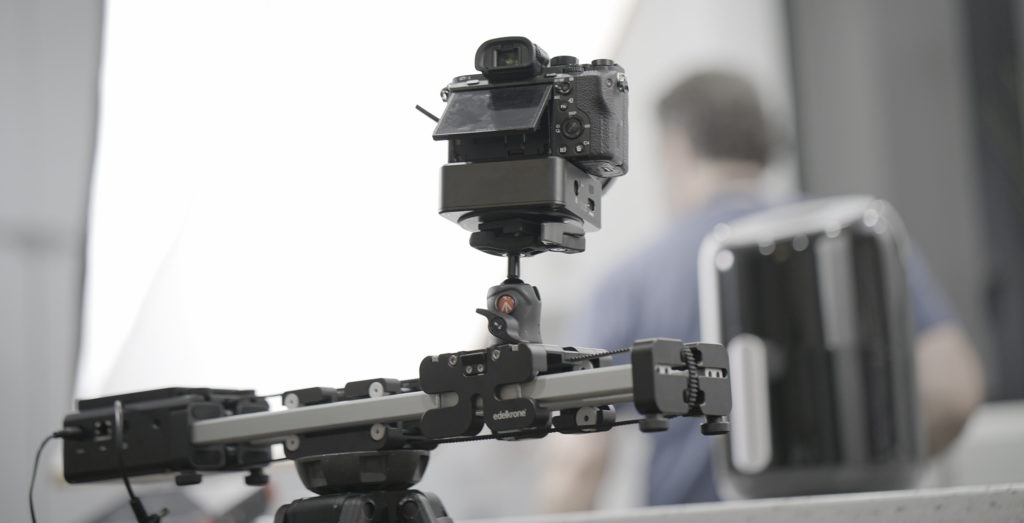
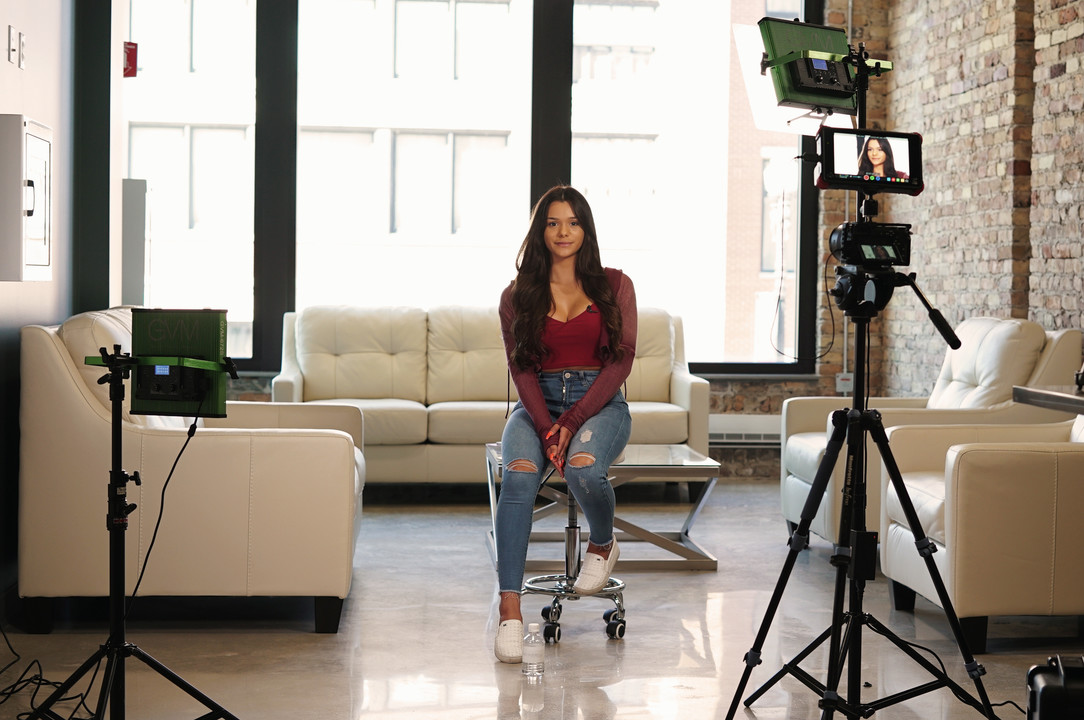
Video Production and video content will be more important now than ever.  Every business owner will be looking to reach their potential client virtually.  Often this is done through video conferencing but when scheduling conflicts arise, many will be relying on filmed content.  As a professional videographer, I try to emphasize the value of professional video production.  The quality of video is a must of course but it is the quality of audio that separates amateur video content from professional video content.   In this article, I will talk about how you achieve that professional sounding audio.

Choose the Right Microphone for Video Production

The first thing to consider is the choice of the microphone.  More specifically, the location of the microphone is really the key in producing high quality sound.  The closer the microphone is to the subject the clearer the sound will be.  A recorded sound source has a signal to noise ratio.  The signal in our case is the speech of the human subject, while the noise are the sounds of room fans, crowds in the backgrounds, wind outside, and the echo of the voice created by the speaking subject.  Good microphones have higher signal to noise ratio.  However, even very high end microphones will pick up noise if the room is not quiet. 

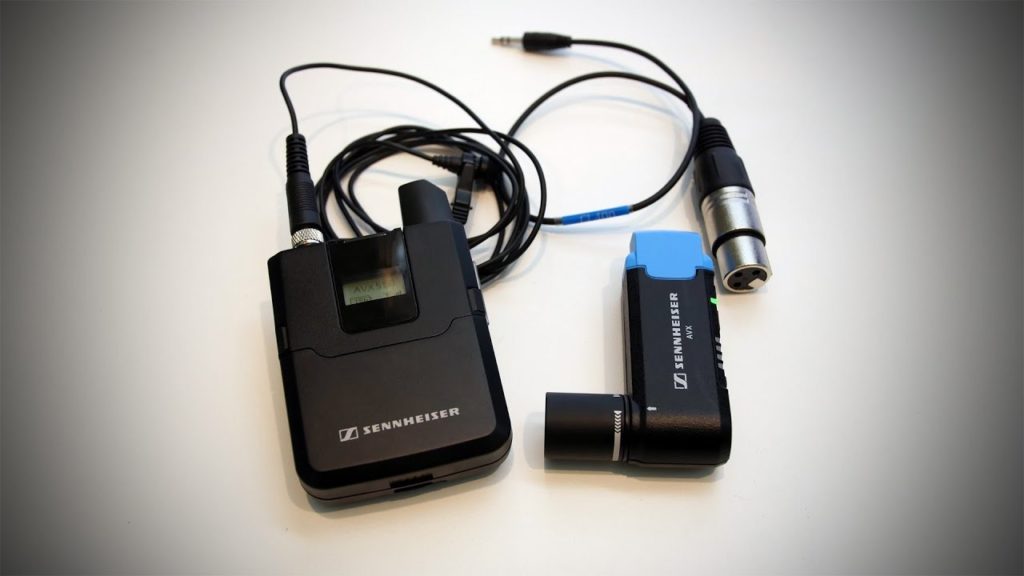
My favorite choice of microphones are lavalier (and often wireless) microphones for any film or video productions.  When I film an interview I can clip the mic about 6 inches from the mouth so the speaking sound is well recorded.  Most lavaliers have what is known as an omni pick up pattern which means they pick up signals equally well from all directions.  This means that a lavalier microphone can be clipped upside down and it will still sound clean.  Another popular choice for recording speech in film and video production is a shotgun microphone.  The pick up pattern for a shotgun microphone is very narrow which means that the microphone has to be pointed directly at the speaker.  However the narrow pick up pattern reduced the noise by eliminating sounds that are not in focus (or pointed at with the mic). It is important to remember that the shotgun microphone needs to be placed as close as possible to the speaker to pick up good sound.  Although, I personally prefer a good lavalier mic, there are instances where the shotgun mic actually works better.  For example, when there are multiple speakers talking over each other, multiple lavalier mics can interfere with each one another.

Sennheiser lavalier wireless mic set I use in my video production
This is a Sennheiser lavalier wireless mic I use in my video production

Learn Post-Production Audio Tools

Once audio is recorded using a well positioned microphone, more work is needed in film or video post production.  As a professional videographer, most of my video editing work is done in Adobe Premiere software.  However, I like to migrate my audio work to a Digital Audio Workstation (DAW).  DAWs are programs designed for musicians to produce their work.  These programs offer flexibility that simply Premiere and other video edit programs do not.  In this article I will not go in depth why DAWs are better for audio, but instead focus on a few key components of audio mixing. 

This is a DAW that I have been using for years, however there are about dozen other ones that will do the job.

The first mixing tool that I use when treating recorded audio in video production is compression.  Compression allows to attenuate the volume of parts that are too loud and increase the volume on parts that are not loud enough.  This treatment can also resolve volume inconsistencies that occurred during the video filming session.  Next in the mixing chain is equalization or often referred to as simply EQ.  EQ allows us to increase the volume across specific audio bands.  For example, most speech recordings have the low end rumbling sound when initially recorded.  Using an EQ I can reduce the rumble by cutting off all audio frequencies say below 70 Hz and create more presence in the high frequency by increasing volume at around 6 kHz.  Another useful tool in the mixing process is the noise reduction. There are many good ones out there but essentially what they do is scan the audio source and use an algorithm to separate signal from noise.  Of course, these tools are far from perfect and they only help and cannot be used in place of good recording.  Another tool that is often used to reduce noise is gate.  Gate basically has a threshold at which it allows the sound to pass through.  So if noise is below that threshold, the gate will be closed and no audio will pass.  The gate is very useful at reducing noise in between words.  The scope of this article cannot cover mixing tools like compression, gate,  and EQ in detail but there are hundreds of articles and Youtube videos that focus specifically on these tools.  Below is a video in which I thoroughly explain my approach to mixing sound, sound design, and score in film production. 

A tutorial I made on the process of mixing for film. I am using a scene from my film THE ARTIFACT

Audio is Key to Professional Videographer

In this article I merely hinted at what is the process of getting clean audio in film or video production.  Of course, each video session is different and presents a variety of audio problems with an even larger variety of solutions.  In the end, a professional videographer has to learn how to record clean audio.  Essentially, it is the ability to handle the audio that separates a professional videographer from a photographer who simply hits “record” on his/her very capable camera.  

For more sample of our work click here

Does the Camera Matter to a Videographer?

As a Videographer, does the camera make a big difference me?  What is the best camera for professional video production?  How much do I have to spend on a camera to produce professional looking videos?  As a professional videographer and a filmmaker I get these questions all the time.  Given that nowadays everyone is doing some type of video and most want to have that professional video look. But how is a professional video look achieved?  Is it really in the camera or something else?   

How much Should I Spent on a Video Production Camera

I am writing this article for the amateur who wants to know how to improve their video. So When I will be discussing pluses/minuses of different camera gear I will focus on generalizations.  Pros argue about cameras and their qualities all the time, and they compare specs like 8 bit 420 vs 10 bit 444. You can find 100s articles and youtube videos comparing footage side by side. We are going to skip such details for this discussion.

So, why do some video production cameras cost $30k and some are under $1k?  On paper, many of these cameras produce the same specifications.  For example, my Iphone can now film 4k video. Why spend thousands of dollars on a video production camera?  Let’s start with sensor size. More expensive will have large sensors. These larger sensors have two major advantage.  Dynamic range and color information. Dynamic range refers to the amount of information between black and white tones in video/film.  For example, movies are shot on cameras that have a very high dynamic range, and that is often most visible on skin tones. In movies transitions between dark and light parts of the skin tones tend to smooth.  In contrast, most news footage or something shot maybe with a gopro or phone will have skin tones that are flat, and hence are missing that cinematic look.

Another advantage of larger sensors is the shallow depth of field.  Shallow depth field allows you to focus on the subject while everything in the background becomes out of focus. The out of focus area is often referred to Bokeh and it gives that cinematic feel, especially when framing people in the shots.

Interchangeable lenses is the other plus with the more professional cameras.  A camera on the phone for example has only one fixed lens. However, changing a lens on a professional camera allows me to film something farway or frame a very wide shot. 

What do the Pros use for Video Production

So What is the best video or film camera?  This is once again complicated. For example cameras that are used on movies sets like these RED or ARRI produce amazing images.  However, they are also more expensive than most cars. In addition, they are large and often require a crew to operate. They often are not good with low light as they are meant on production sets where the crew spends hours setting up perfect lighting.  Hence, unless there is a $5k a day budget for production, even most professional videographers will not used this type of gear.

camera, videoproduction, videographer

Arri Alexa, camera most often used in films

Mirrorless Revolution for Video Production

In the last several years there has been a revolution in the mirrorless camera.  These cameras most often have large sensors and interchangeable lenses. The prices will range $1k-$3K.  For that price they produce very good dynamic range and color information discussed earlier. Yes, the color and dynamic range on camera like RED will be superior, but the quality of RED might be 10% better yet at 10x the cost.  In addition, mirrorless cameras are small and much more mobile and they often perform well in low light.  

For most professional video projects I have to be mobile and don’t have the entire day to set up one scene with larger gear.  Therefore, my workhorse for several years has been this camera ; Sony A7sii. In fact most of the work on my website was produced using this camera. Here is a link to my video work

https://www.nichevisuals.com/video.html

camera, videoproduction, videographer
Sony a7sii, a mirrorless camera with very high quality video capabilities.

Importance of Video Post Production

Lastly, there are many improvements that can be made to the quality of image in post production.  Talented videographers and filmmakers know how to use color grading and color corrections during the post production to create the desired video look.  Digital footage is very flexible and many changes can be applied to correct the look. Below is a comparison of footage that is graded vs no graded.

In conclusion, a fortune does not have to be spent to create professional looking videos.  The evolution of the mirrorless camera has changed the game. In addition, skill and practice is also needed in the post production in order to achieve that professional video look.

For more information click here

Drone Videogrpaher – Video Production in the Sky

In the last several years there has been madness around drone video production and photography.  As a videographer, I am constantly asked for drone video footage. At times the drone video footage is appropriate, but at other times the use of a drone is only reflective of an appetite for the latest fad.  In this article I will discuss when it is appropriate to use drone for filming or video/photo production, few simple safety rules and regulations, and how to get those cinematic shots.

When to Use drone videography

Clearly, drone footage is highly desirable, and it certainly adds production value simply unavailable to a low budget filmmaker or videographer just a decade ago.  However, I can think of only a handful of films in which drone footage was an actual scene. One being Denis Villeneuve’s “Sicario”, where the scene is a convoy of agents crossing the border.

Drone video footage is most effective as an establishing shot or a transition.  Realistically, a drone video in the final edit will unlikely be longer than 10-15 seconds.  Majority, of scenes in films and corporate / event video productions are composed of medium shots where people either talk to each other or physically interact.  For such shots a good camera on a tripod or gimbal will do. A good example of an establishing shot is the clip below

Within a few seconds the viewer has a good idea that the film will take place in a city and during winter.  Without a drone, the same information would have to be described using several shots.

An example of a good transition is the clip below where we show few trucks leaving their base and going out on an assignment. 

The shots prior to he drone shots convey the story of workers getting ready and shots after the drone shot convey a story of these men at work.  The drone shot gives a completely different perspective than the other shots, hence it serves its role as an ideal transition.

Commercial vs Recreational Drone Videography

There are two uses of a drone that clearly have to be distinguished when talking about rules.  One is commercial work, where the aerial videographer is getting paid for his/her work. In such a case, the drone operator needs to be certified through FAA (part 107) as an unmanned pilot.  For recreational use, such as filming one’s vacation or private party, the pilot only needs to register the drone with FAA and the cost is currently only $5. The FAA has a list of rules that need to be abided by all unmanned pilots.  In this article I will point out to three main ones; flight is restricted to only 400 ft, pilot cannot fly 5 miles from the airport, and a drone cannot be flown over people (unless they are crew and have shelter to hide). The first two rules are usually programmed in the drone control application.  In other words, the drone will recognize airport controlled air space and will not fly there, and it will not fly over 400 ft. However, the last rule, flying over people is the one that is most often violated by the recreational drone pilots. It is very important to know that the last mentioned rule is also the one that the FAA is most strict about and heavy fines can result from flying over people.  Rember, you can get away with it during the operation but the footage does not lie.

In addition to FAA rules, each city/county has its own rules that may restrict drone flight.  As Chicago Aerial commercial videographer I understand that city only allows me to fly over the property for which I have written permission to fly over.  In a busy city this creates real restrictions. It is also important to mention that drones operate on the same frequency that are used by most wifi systems.  Hence flying in highly populated areas with corporate offices (Chicago downtown i.e.) create real risk. There is potential that the drone could lose its frequency and fly away.

Think Simple When Using Drone for Videography

Once the rules are considered and the effectiveness of aerial shot is understood, a drone is a great tool for video and film production.  If there was going to be one lesson that I have learned as a filmmaker and a videographer that I would like to pass on to in this article is that of simplicity.  Simply, the viewer should be focused on the scene that is framed not to the motion of the drone. Beginner aerial videographers tend to fly too much around the subject they are filming.  For example, the first 35 seconds of this clip we have at least 5 changes of direction and pace which in my opinion are disruptive to the viewer.

Yes the effect is cool and the scenery is gorgeous but the abrupt changes in the flight path speeding up and slowing down (in post production) takes me out of the viewing experience.  I am more focused on what the drone is doing than the actual scenery. However, lets consider the following drone clip:

In this video we have a change of direction but there is a poetic simplicity to it.  First 18 seconds the shot is framed around the human subject and then gently moves to frame the waterfall.  This is a well thought out drone shot that frames two subjects continuously (man and waterfall) with no interruption.  The last shot is likely most cinematic (1:34 to the end) where the drones simply flies slowly forward.

Conclusion

In conclusion, drones are a fantastic tool for filmmaking and video production.  However, the footage is mostly effective as an establishing shot and transitions in the majority of film/video productions.  Lastly, drones have potential for high risk and therefore many rules have to be followed in order to assure safety in capturing those stunning shots. 

For more information click here

Time Lapse Videography- How to Compress Time

As a videographer, I am always trying to effectively tell a story. I have discovered that one of the most effective storytelling tools in video production is the time lapse. 

With a time lapse you can compress a long and static event into a short engaging video clip. An effective use of a time lapse videography is a party like the clip below where people mingle around but don’t do anything too interesting to capture as video clip. As a single video shot this would be as interesting as watching grass grow.  However, when compressed into about 3-5 seconds the video clip is engaging, and it tells a story without boring the viewer.

Consider Your Subject for your Time Lapse Videography

When making a time lapse there are few things to consider. First, what is it that we want to focus on.  The image that we want the viewer to lock on should be still or slowly progressing/regressing. On the other hand, the figures or characters moving around will be moving fast and so we want to blur them out. In video production of a time lapse this is achieved through motion blur with the use of a slow shutter speed. The shutter speed in the above mentioned video clip was set at 1/3 sec and we get a ghosting effect of the people.  Hence, the viewer perceives the activity but is focused on the aesthetics of the room and people who are still or moving slow. 

Add Movement to your Videography

Another important element to consider when setting up a time lapse video is movement. As discussed earlier, repetitive movements like people mingling around should be blurred.  However if we want to add drama to the video we can SLOWLY move the camera to the point of focus

Or we can SLOWLY move around the subject like here.  The movement should be just above the threshold of being noticed because this type of movement is effective if it is felt rather than seen. 

The slow dramatic movement of the camera in a time lapse is achieved by using a mechanized slider.  The slider moves the camera progressively from start to end point every time a picture is being taken. 

Alternative Methods of Time Lapse Videography

As a videographer and a filmmaker, I don’t always set up a traditional time lapse where camera takes picture over set period of time. Sometimes I will film a long video clip knowing that I will manipulate the time. For instance, I will speed up a gimbal video clip to make the a scene more dynamic. An advantage of this video production technique is that I can slow down the clip at specific moment to highlight something interesting.

There are also some very sophisticated time lapse techniques where the slider movement and or speed of the time lapse change over the course of time. These type of time lapse video productions require careful planning and tools like a computerized application that can control video production sliders or dollies.

In sum, a time lapse is a video production technique that can show something otherwise boring in a new, fun and engaging way.  And yes, it can even make watching grass grow exciting!

For more information click here

Videographer and The Art of an Effective Interview

My bread and butter as a videographer (especially a Chicago videographer) is filming interviews and testimonials. I have filmed hundreds of such interviews, I have worked with other videographers setting up interviews and I have seen many more video interviews all over the web. Over this time I have learned a few important keys to making a good and engaging interview.

Be Brief

First point, be brief. When I set up a video production interview I usually end up talking to my subject for 30 -40 minutes.  However, an effective interview video with one subject is 1.5 minutes to 2.5 minutes. When I get a response from my subject that is long, verbose, and it feels like he/she is wondering with an idea, I let them finish, complement them on how good their response was and ask them to summarize it in 2-3 sentences. Sometimes it takes a few takes. Hence, allow 40 minutes for an interview. 

Make the Video Production Interview Conversational

Secondly, make the interview conversational. There is nothing more boring and flat than reading off questions to the subject.  As humans, we are social beings. Yes, the subject understands that ultimately he/she is talking to an imaginary audience and he/she is just being filmed. However, I have seen shy people open up to me when I engaged them with a conversations. They forget the camera is pointing at them and give me content that is riche and personal. At times, as videographer, you can’t engage in conversation or you don’t feel comfortable doing it, and prefer just attending to the gear. If this is the case, it is worth bringing another person to whom the subject can talk (and engage). 

Use 2 cameras for your Video Production

Always use at least two cameras for your Video Production.  Having multiple angles makes the editing much easier.  You can easily cut the interview and jump from one camera to another during the transitions.  Cutting interview filmed with one camera creates distracting jump cuts. Additionally, having multiple camera angles makes the video more dynamic. Sometimes, I even add a little slider movement like in this video to add more dynamic feel to an otherwise static shot.

Sound is Huge for Quality of your Video Production

The sound quality is huge. In my video production I use high end lavalier microphones. The lavalier mic is close to the subject and you get much more voice signal and less environment noise. Truthfully, most viewers watching these types of videos will not be able to tell difference between a video shot with a $30k camera and something shot with a smartphone. However, bed sound is immediately noticeable. Bed sound screams “amateur” video. If you don’t have a good lavalier mics you can use a shotgun mic. Ideally, you want to get the microphone as close to the subject as you can. You can mount such microphone on a stand and run the cable to the camera. Mixing of the sound is also crucial. To get that professional sound quality you always want to add a little compression to the sound, so the loud parts are attenuated and quite parts are turned up. I often use a little EQ to remove the low end of the sound spectrum. When mixed with some music, the voice that is compressed and lightly EQ will cut through the mix easier.

You will need Good B-Roll for engaging Videography

Lastly, to make a video interview engaging you need to have something visual to cut to. Often this is B-roll. B-roll shots are visuals scenes that support the story the subject is telling. However, sometimes I use photographs from the subject and build a collage that visually tells the story. When I do this type of a collage, I actually prefer photos that are not taken professionally, as they better represent the reality of the person being interviewed.  

In sum, a video interviews need to be cut to about 2 minutes, they need to be conversational, recorded with good sound and multiple cameras to dynamic . When done well, they are one of the more powerful marketing tools for any business, product or service.

Learn more by click here